
Silhouette Photos
Objectives:
-5 studio silhouette photos
-All equipment completely edited out
-Change the background color by using either color balance, channel mixer, or gradient tool
-Create interest, shapes, and mood through different poses
-5 studio silhouette photos
-All equipment completely edited out
-Change the background color by using either color balance, channel mixer, or gradient tool
-Create interest, shapes, and mood through different poses
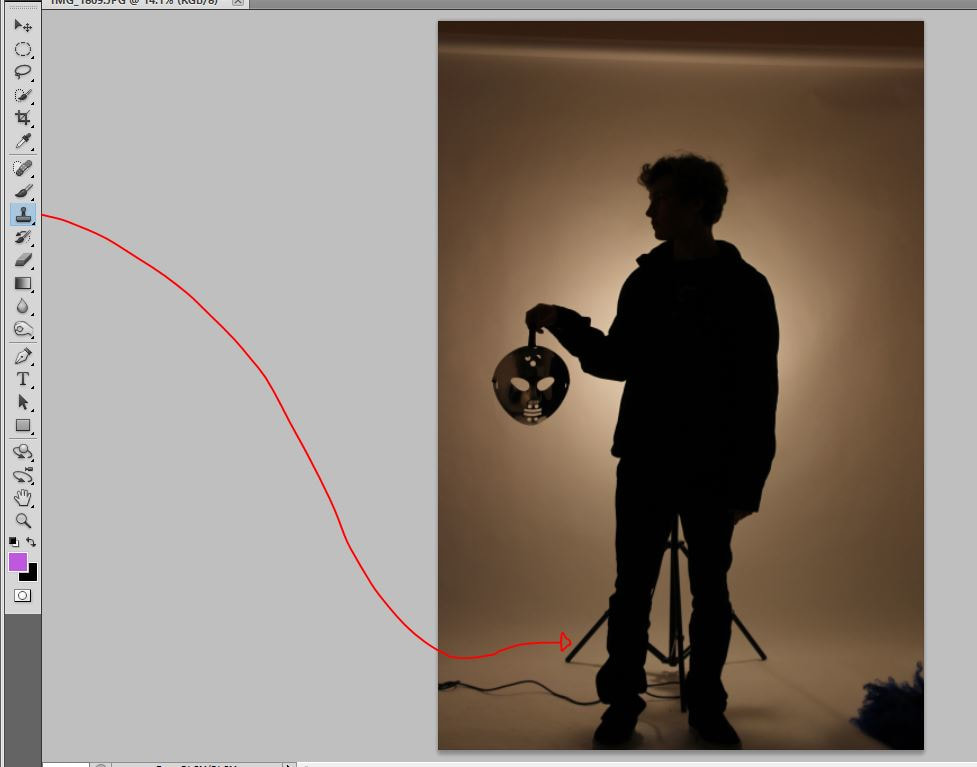
1. First step is for us to photoshop out all equipment or unnecessary objects such as props/rips on the ground, and the bar holding up the backdrop. I have found that the clone stamp is the easiest way to do this.
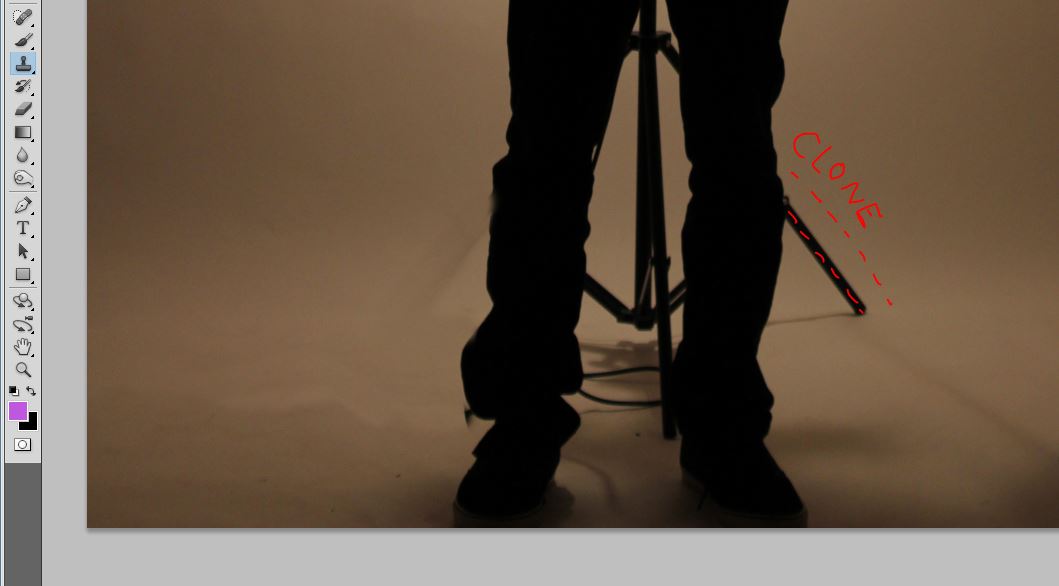
2. Use a small brush and clone directly next to the bar. Try to follow the light patterns and move from light to dark. You will have to press alt to pick up where you are coming from multiple times.
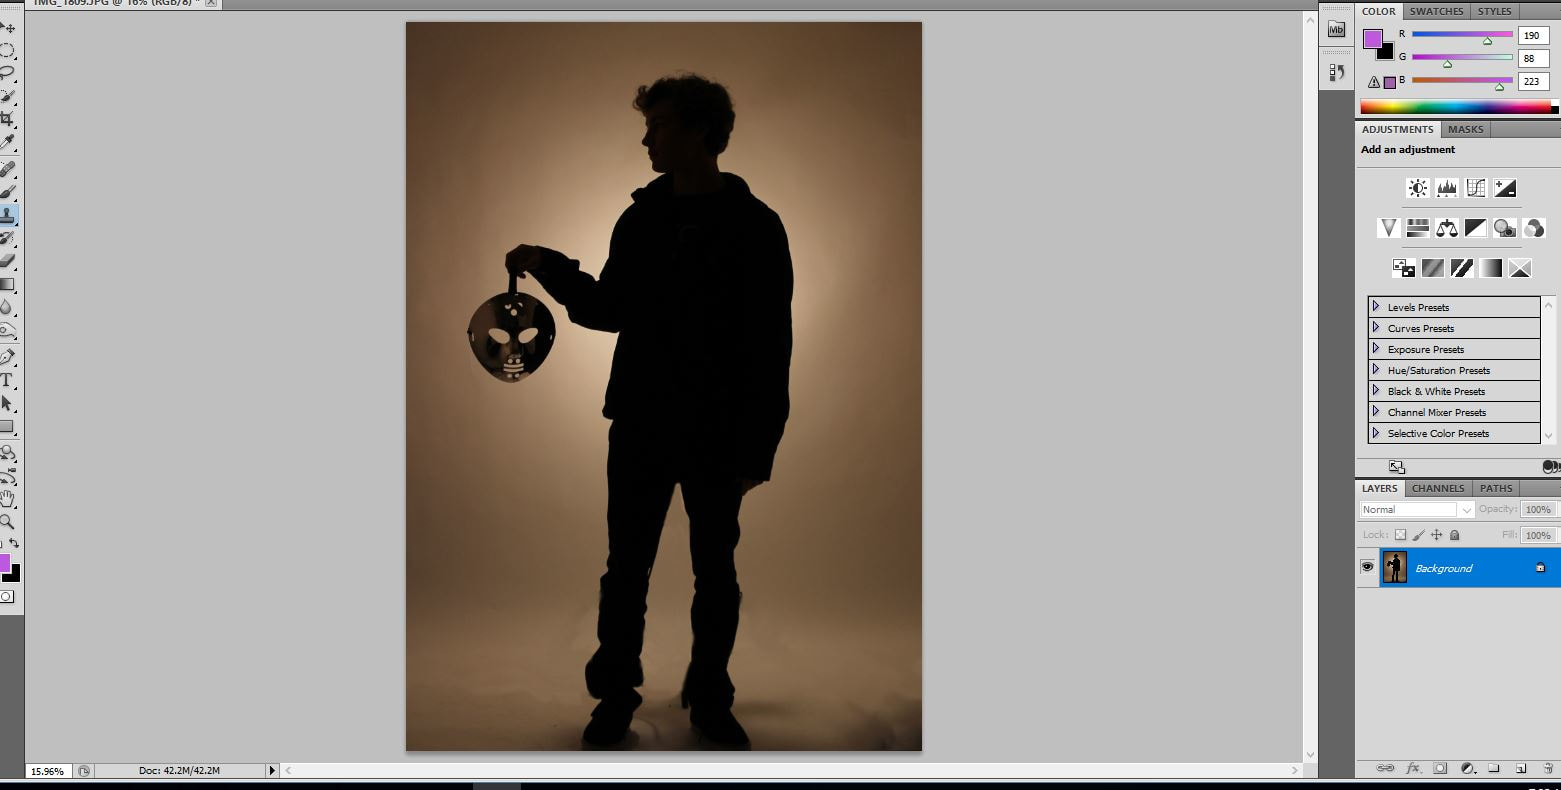
3. Choose a crop that fits your composition well. I didn't need to clone out the top bar holding the backdrop, I just cropped it out.

4. Fix your levels, make sure you close any open gaps with your arrows.
|
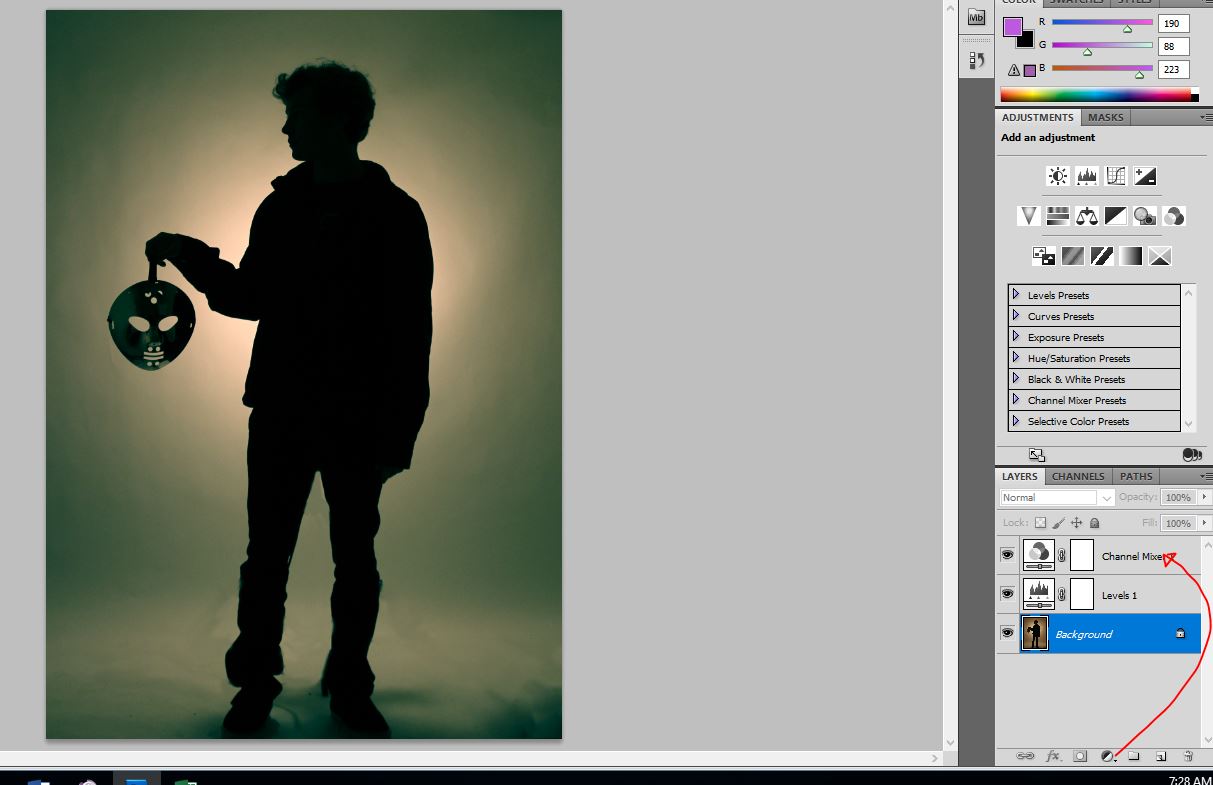
5. Change your background color either by going into Channel Mixer, or Color Balance
|
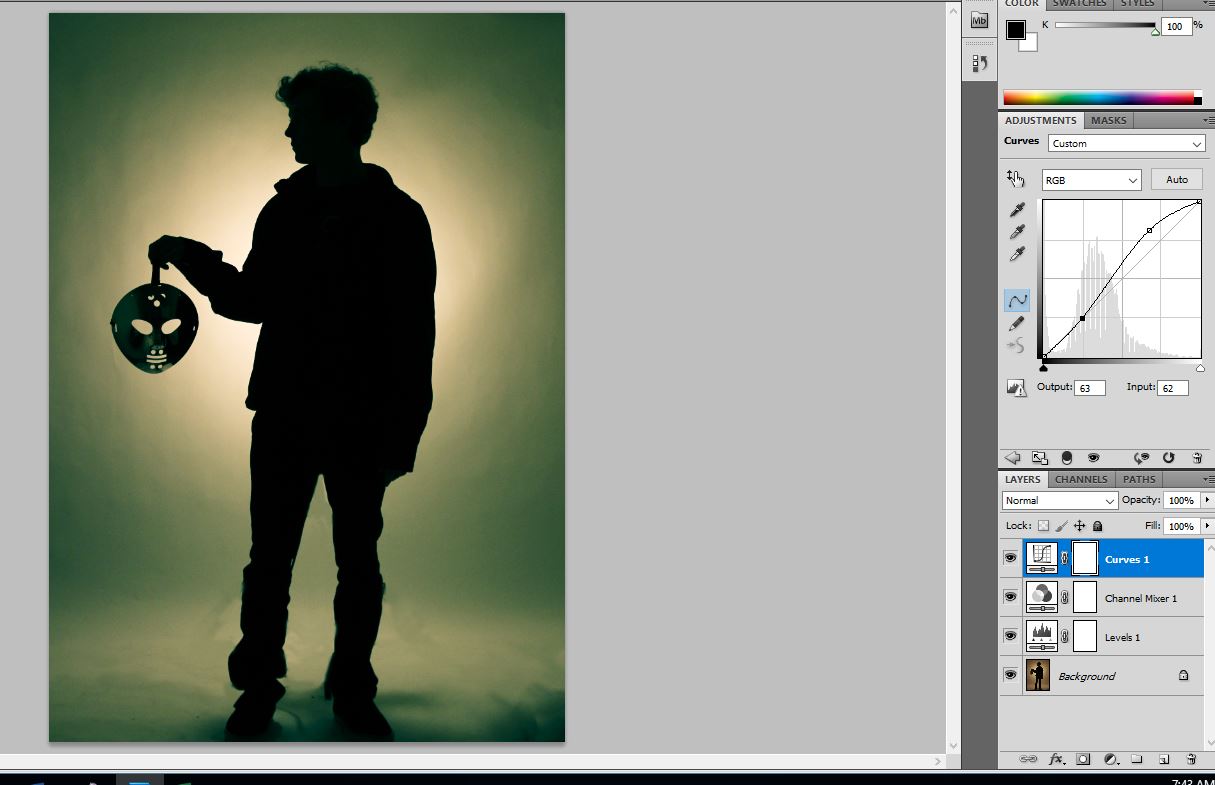
6. For a little extra drama, you can use Cookie > Curves and create your 's' shaped curve to create extra contrast.
Panorama Photos
Objectives:
- Use Photomerge tool in photoshop to create a panoramic
- Add a low filter
- Use Photomerge tool in photoshop to create a panoramic
- Add a low filter
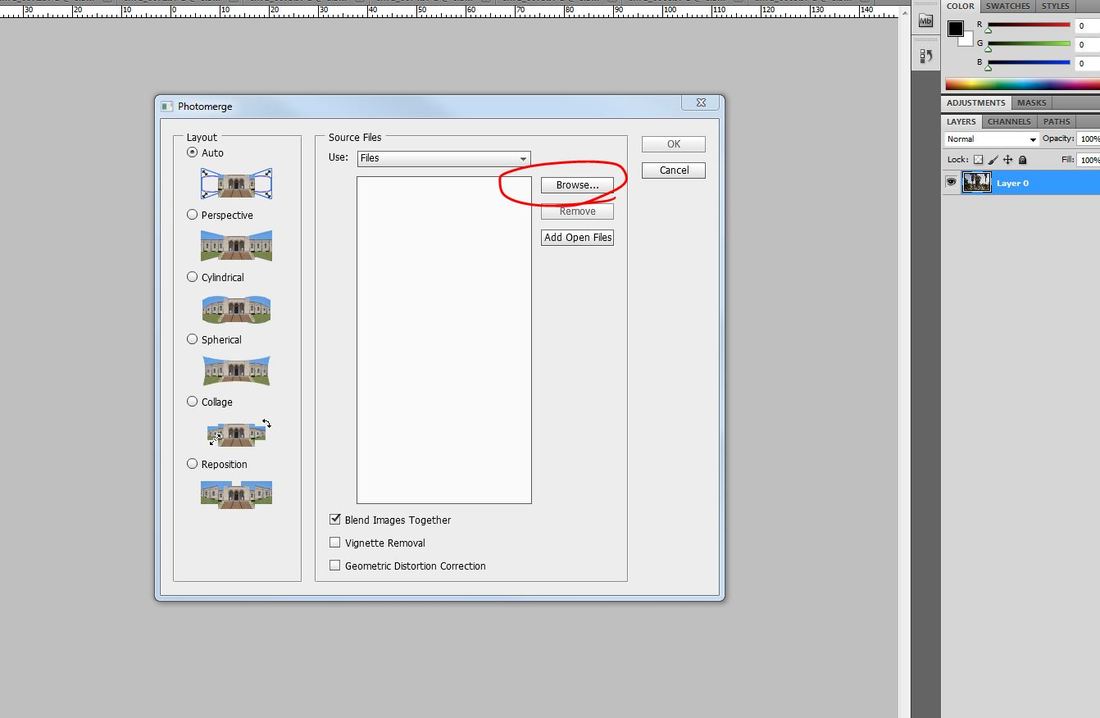
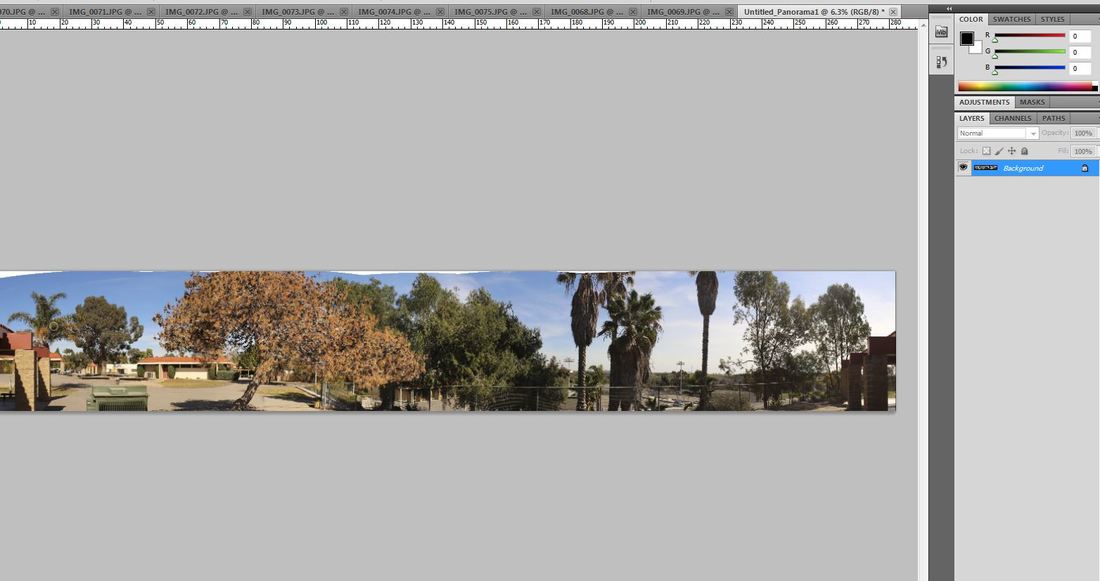
1. In photoshop, go directly to File > Automate > Photomerge.
2. Choose "Browse" and open the folder with your photos.
2. Choose "Browse" and open the folder with your photos.

3. You need to choose all the photos that you want to use for your pano
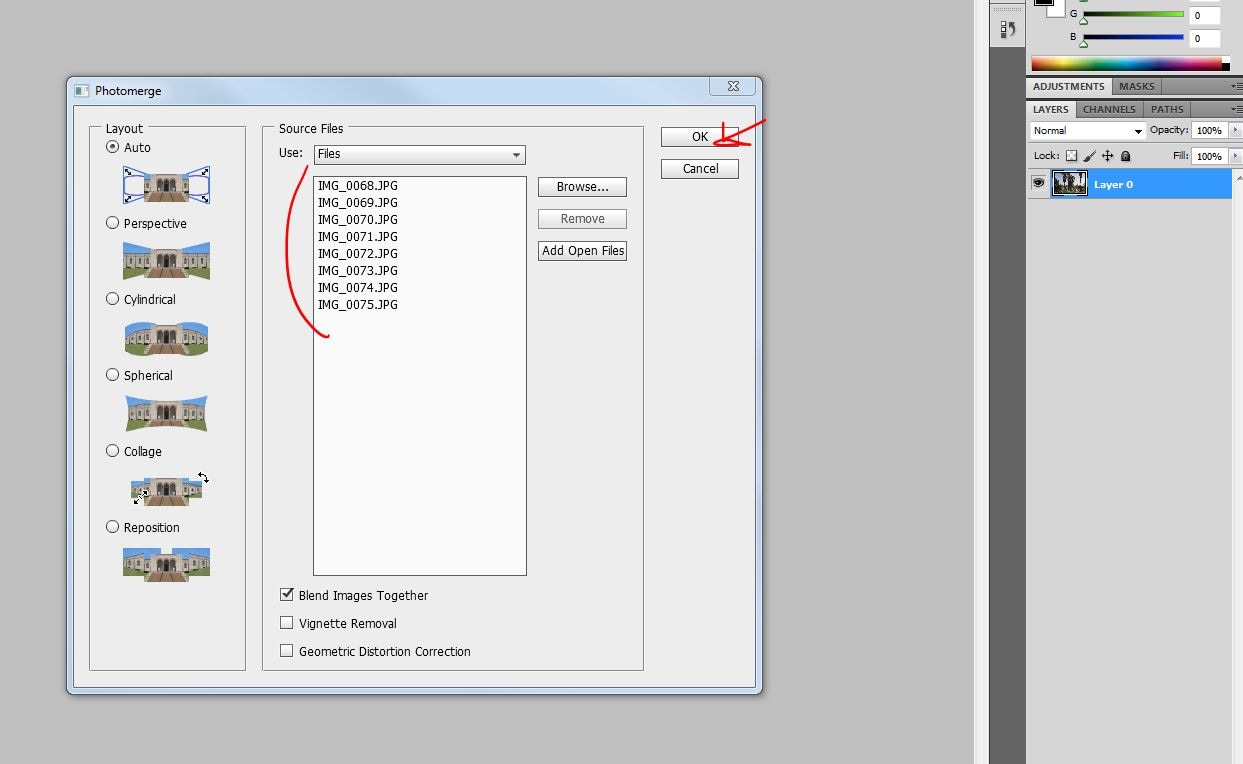
4. All of your photo names should appear in the box, press OK
|
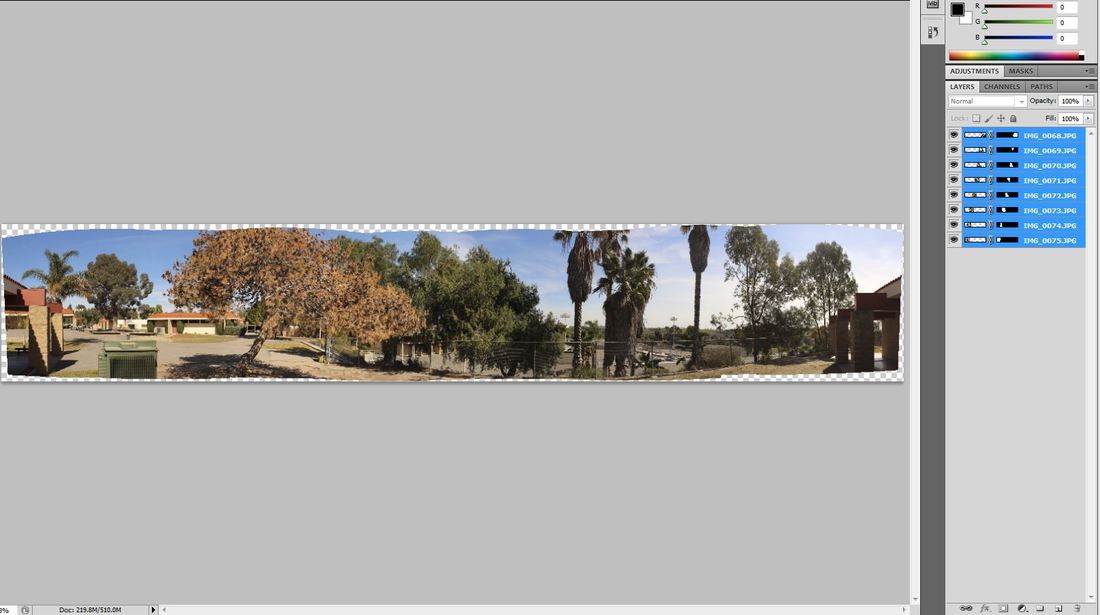
5. Photoshop will take time to merge all of your photos together. When it is finished you will have all of your layers highlighted. Press Ctrl + e to merge them all together.
|
6. Crop most of your white out of the photo
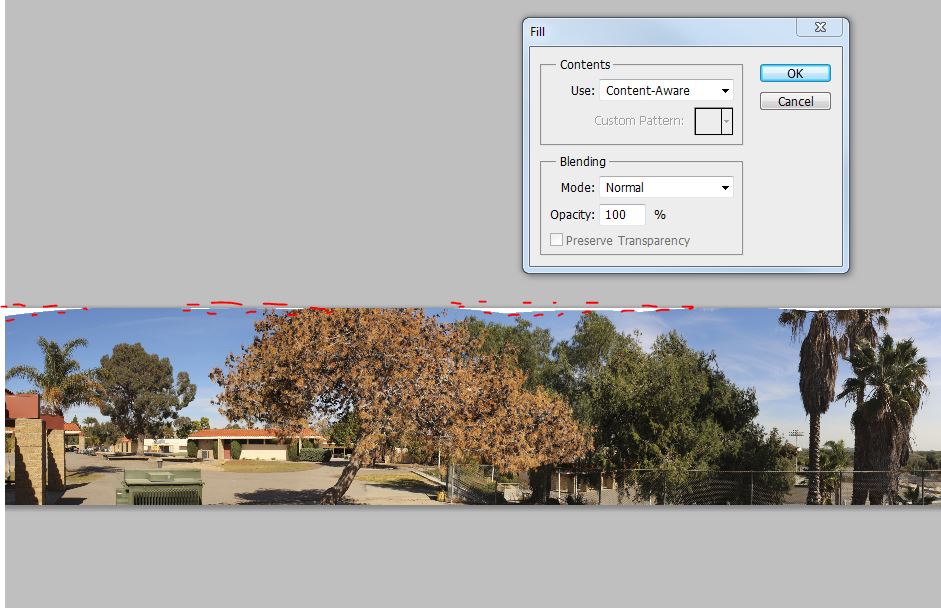
7. Use your quick select tool to get the white spots in selection. Go to Edit > Fill and make sure that it says Content Aware under contents. press OK to fill the areas
|
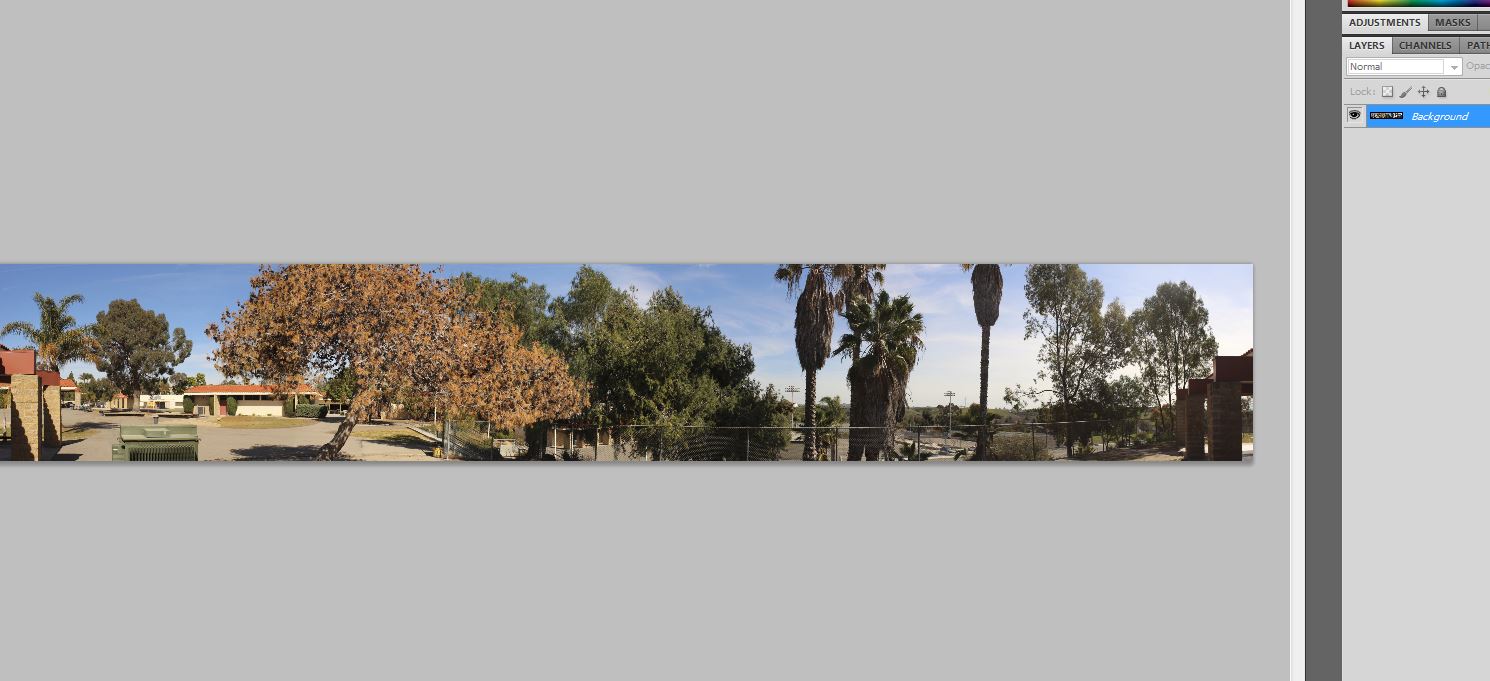
8. To add a filter: Create a new layer by pressing the peeling square under your layers. Use the gradient tool and select two colors for your filter. When you finish placing your filter, lower the layer opacity to less than 15%.
|
Surreal Projects:
-Landscape
-Blended Objects
-Face on Food
-Blended Objects
-Face on Food
Surreal Landscape
Objectives:
-Surreal Landscape including three added objects
-Correct usage of Layer Mask, Selection, and blending
- Add Shadows to create a realistic look
-Surreal Landscape including three added objects
-Correct usage of Layer Mask, Selection, and blending
- Add Shadows to create a realistic look
1. Collect your photos from google and open them to the same document. YOU ARE NOT LIMITED TO ONLY THREE ITEMS
|
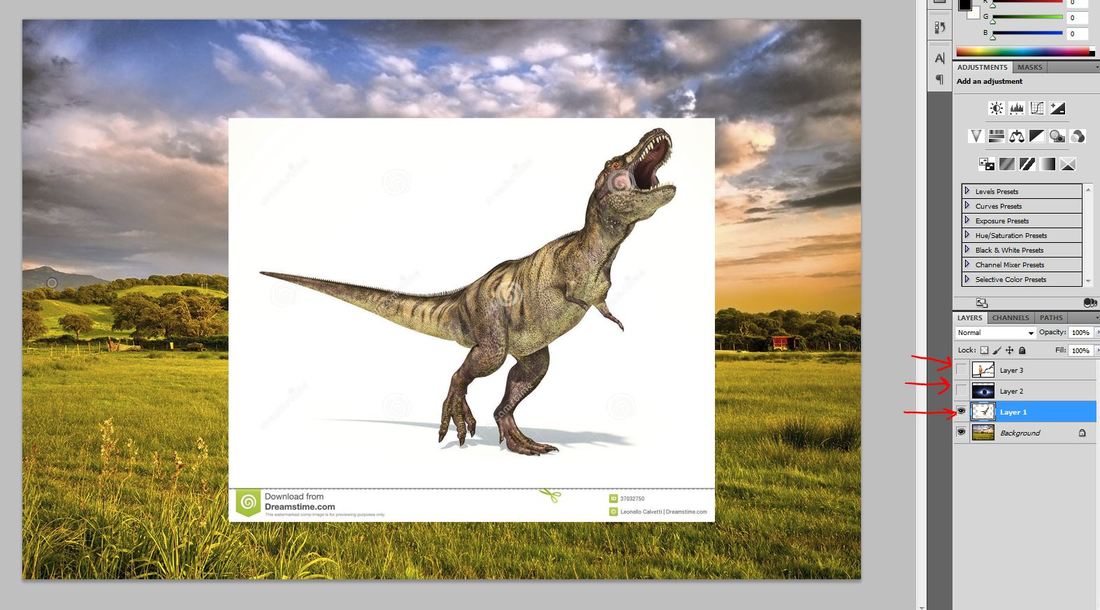
2. Close the eyes on the layers you're not using.
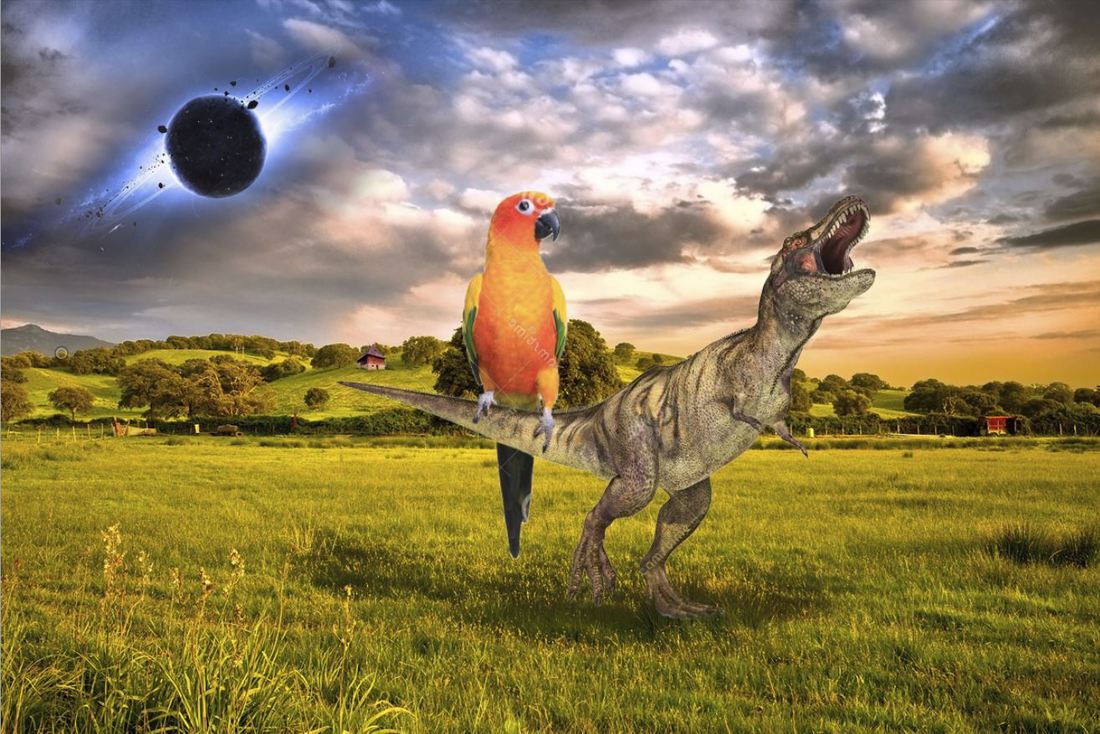
3. Use free transform to resize your layer and place it in the correct location. 4. Delete the background of your photo. For this dino, I used the magic wand tool (Under the quick select tool) to select all of the white and then erased it. |
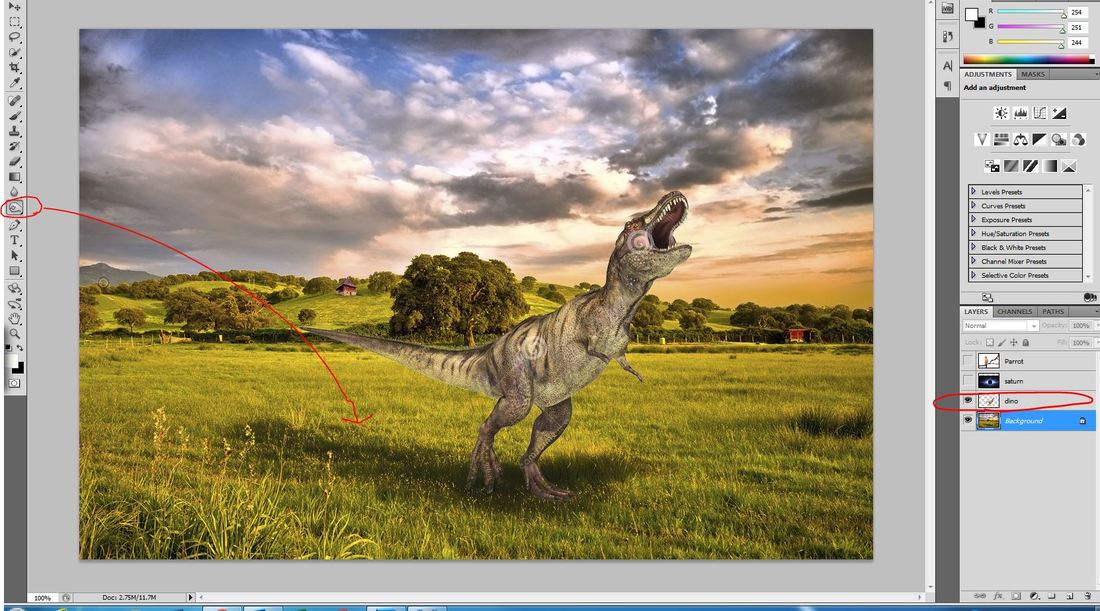
5. Don't forget to add shadows on your background layer to make it look like your objects are actually in the photo! (Burn Tool)
6. I also used the layer mask to show through blades of grass where the foot meets the ground. |
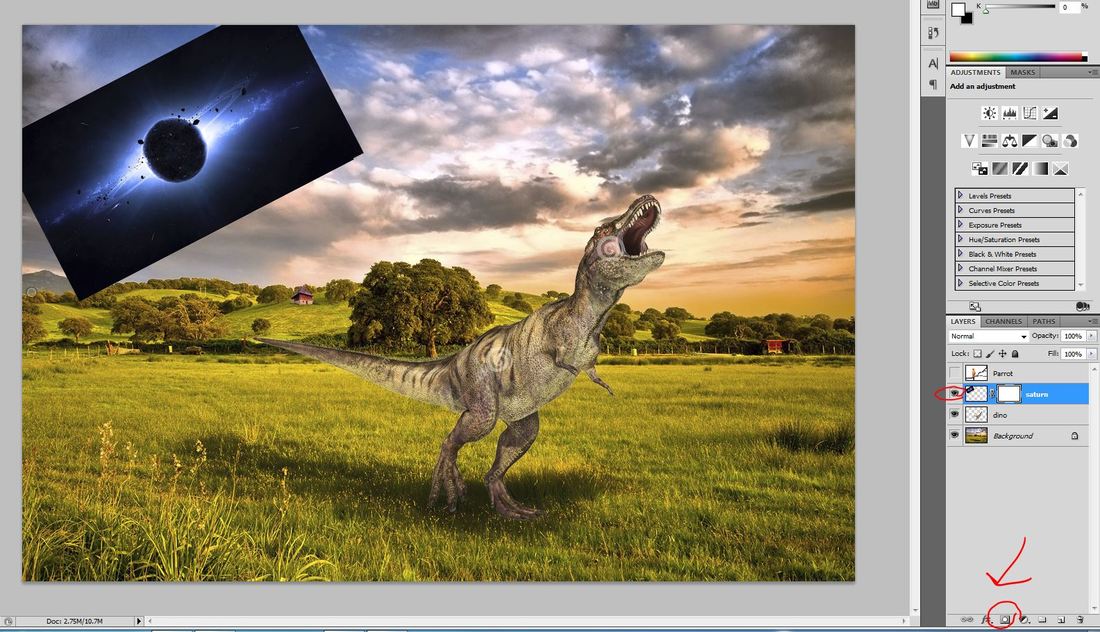
7. Open your eye for your next layer. For the saturn, I free transformed it and then added a layer mask to blend.
|
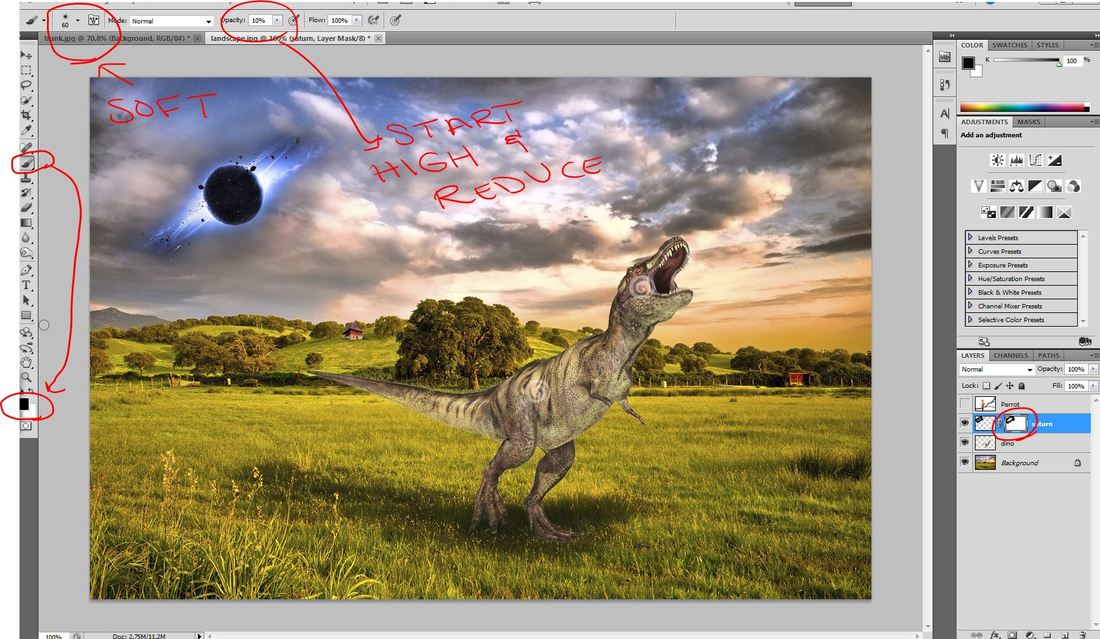
8. To blend using a layer mask, make sure that you are clicked on to the actual mask that is on your layer. Use WHITE REVEALS, BLACK CONCEALS. Use a soft brush, and a low opacity to blend.
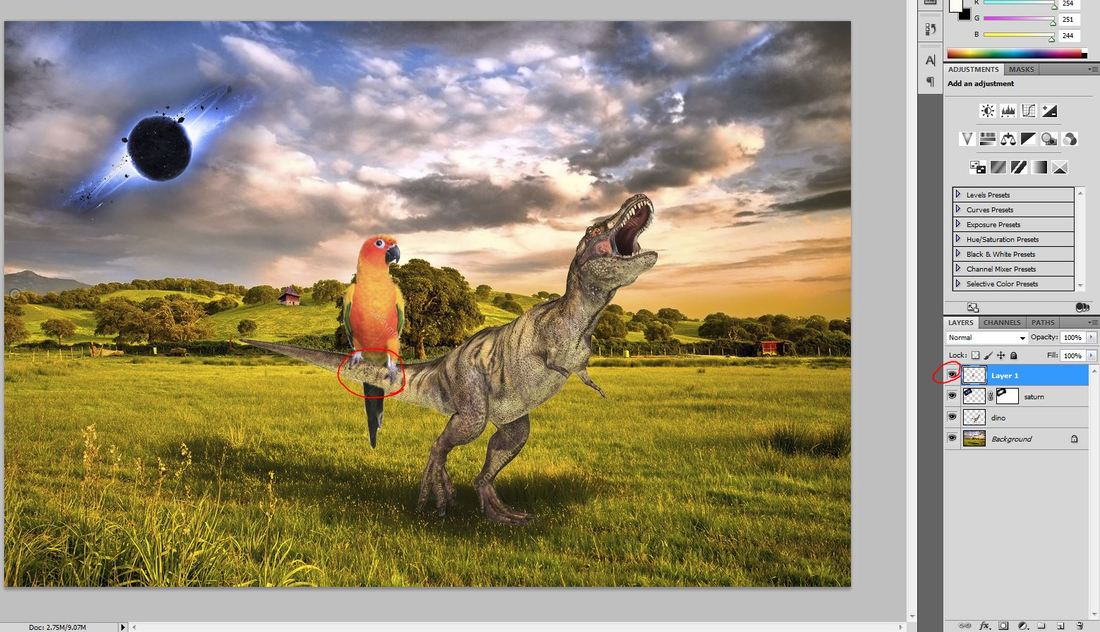
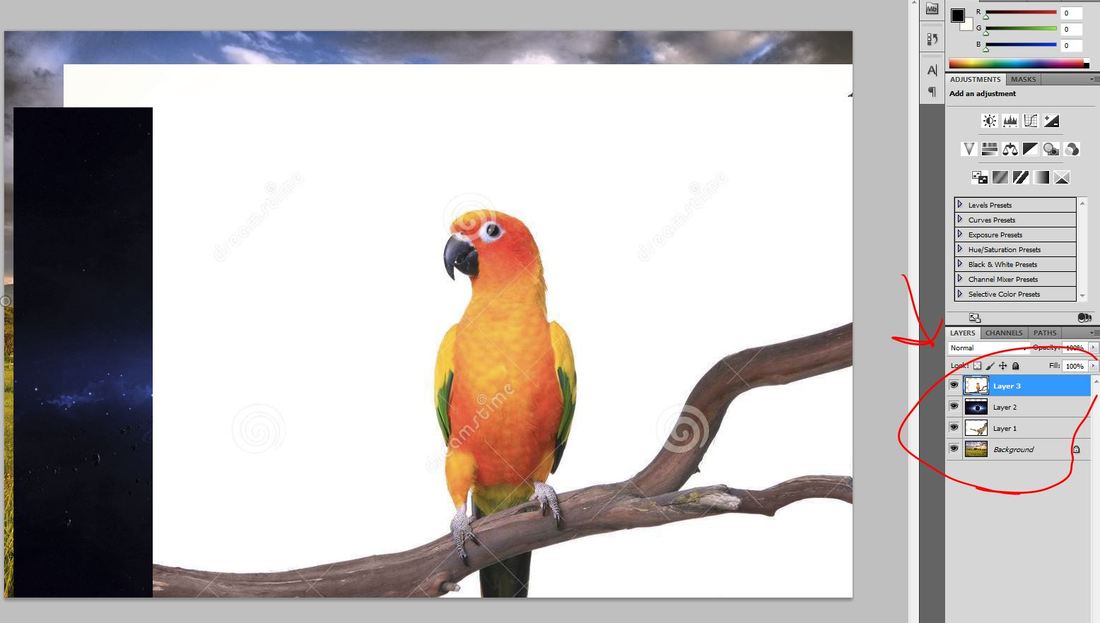
9. Open the eye for your last object (mine being the parrot) I used quick select and refine edge to jump just the parrot, and delete the background that it was on.
**I mirrored the angle of the parrot by going to EDIT > TRANSFORM > FLIP HORIZONTALLY
**I mirrored the angle of the parrot by going to EDIT > TRANSFORM > FLIP HORIZONTALLY
Blended objects
Objectives:
-Blend two or more objects together in a creative surreal way
-Use layer mask to blend objects
-Blend two or more objects together in a creative surreal way
-Use layer mask to blend objects
Example 1: Surfer Cup

1. To place my top layer in the correct location, I lowered my layer opacity so I can see where I'm placing it.
|
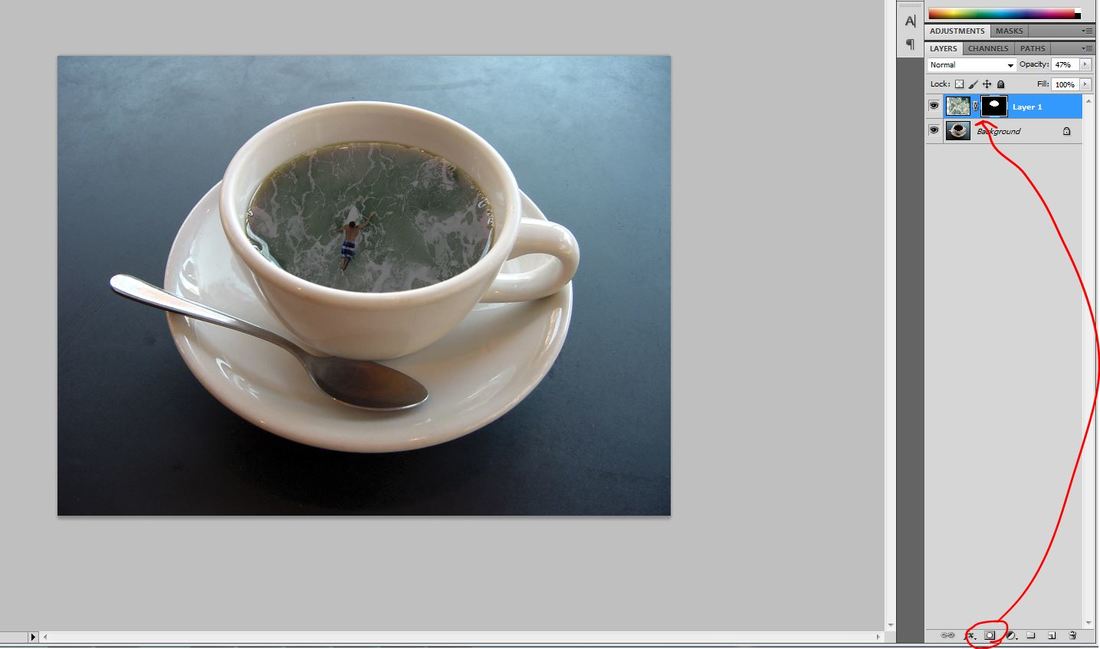
2. I added a layer mask to the surfer layer, closed the eye and then quick selected just the coffee.
3. I opened the eye again to the surfer so that the coffee selection is now showing on my surfer. Inverse the selection so that everything besides the coffee is in selection (SELECT > INVERSE) 4. I colored everything black so that the coffee cup showed through but the surfer stayed in the cup. |

5. I raised my layer opacity back to 100% and got out of my selection (Ctrl + d). I wanted the ocean to be reflected in the ceramic of the coffee cup so I used my black brush with a very low opacity to show more of the ocean on the cup to look like a reflection.
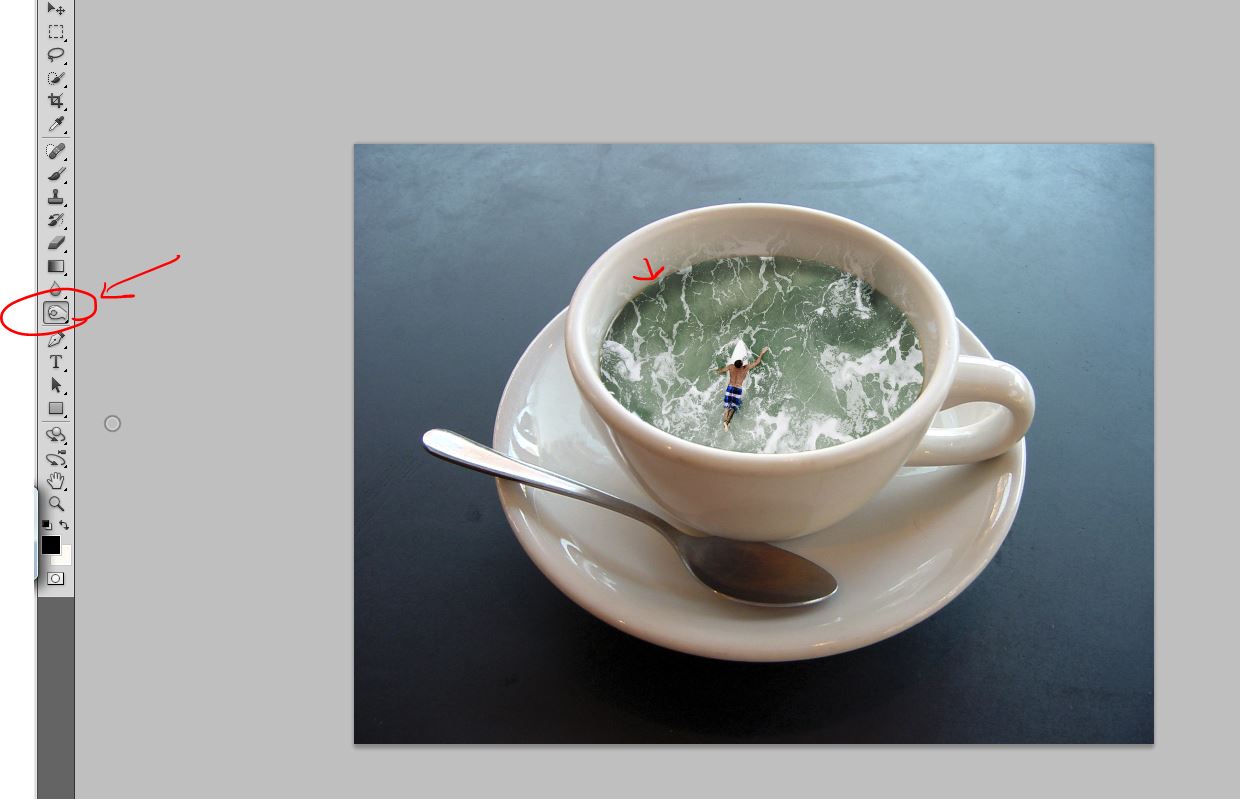
6. I added a shadow inside the cup using the burn tool.
|
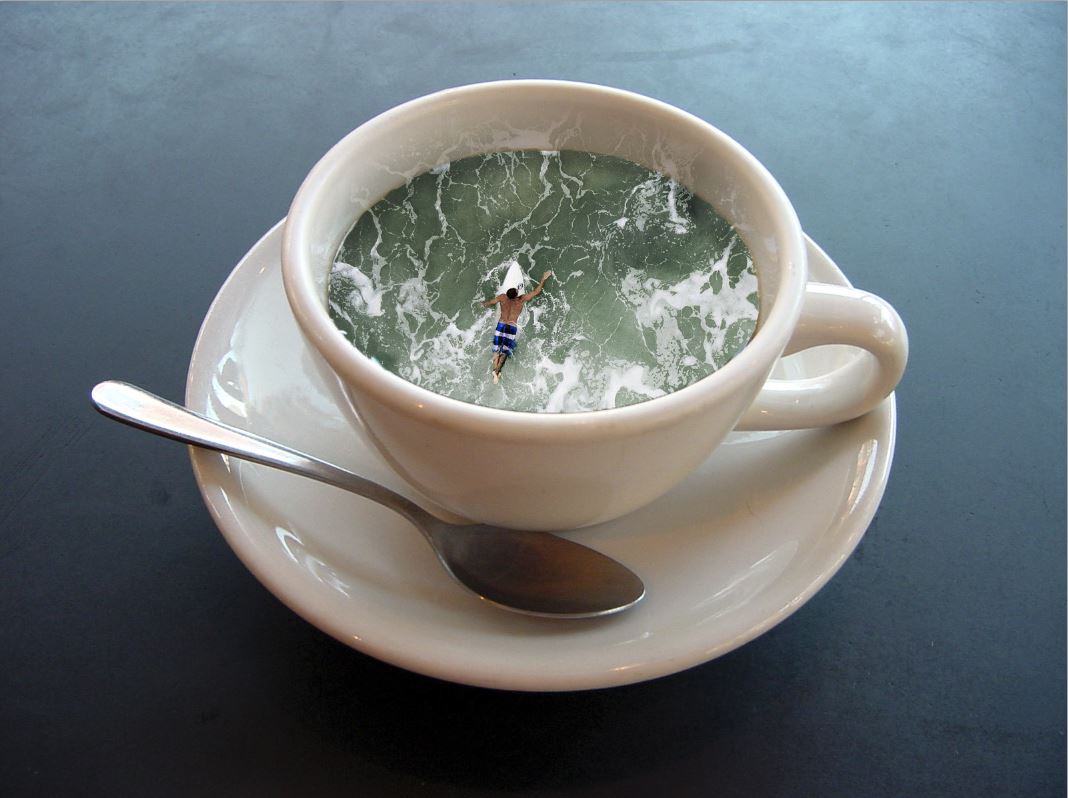
7. Finished Product ^
|
Example 2: Blending Animals
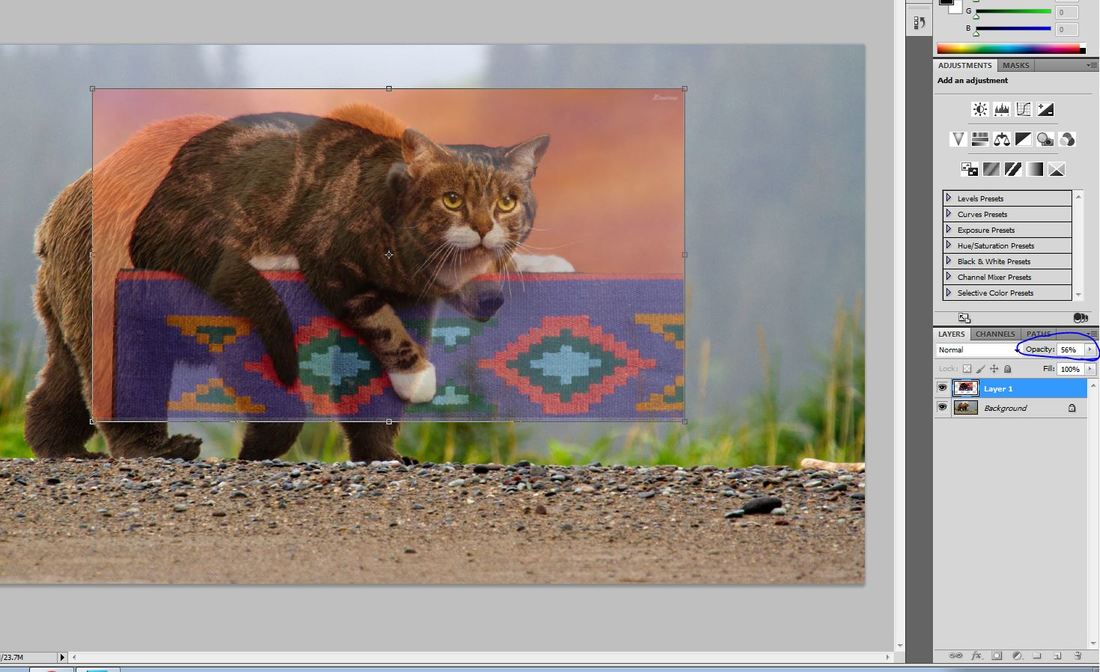
1. Lower the layer opacity to place your first object
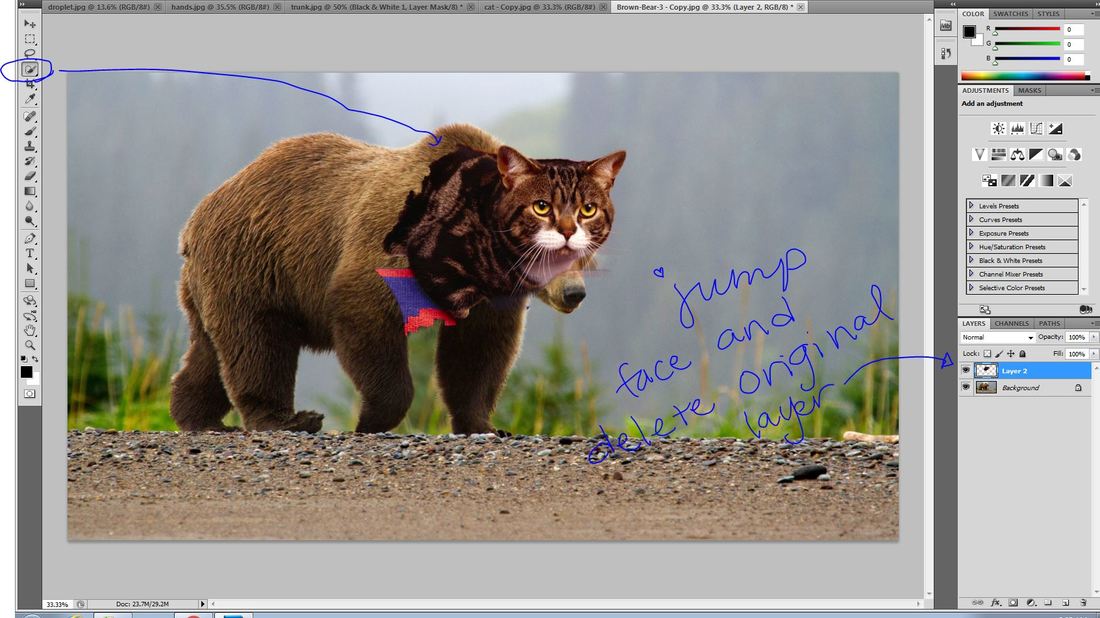
2. Select the head and some of the body to use for blending with quick select. Jump it to its own layer and delete the original layer.
3. On the background layer I had to use the clone stamp tool to get rid of the bear's head. Use Alt to pick up where you want to clone from.
|

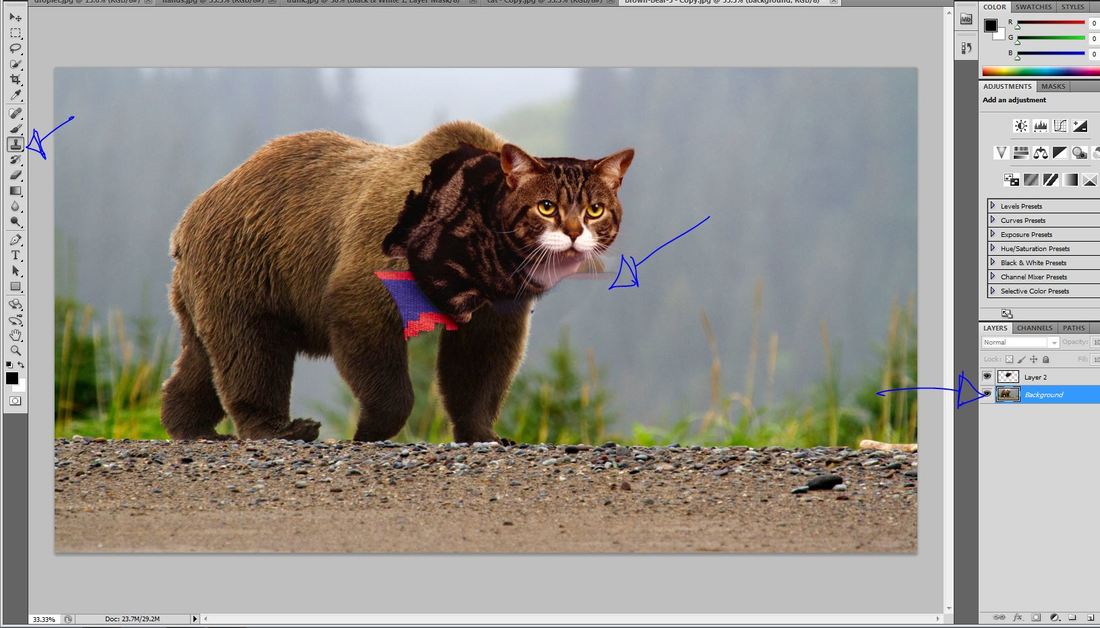
4. Add a layer mask to the top layer and use the black brush to blend the head on to the body.
|

5. I needed to clone stamp a little of the bear fur on top of the cat fur. To merge your layers, hold control and click on both layers and use the shortcut Ctrl + E to merge them. Or go to Layer > Merge Layers.
**Use a low opacity on your clone stamp tool.
**Use a low opacity on your clone stamp tool.
Example 4: Blending 3 objects
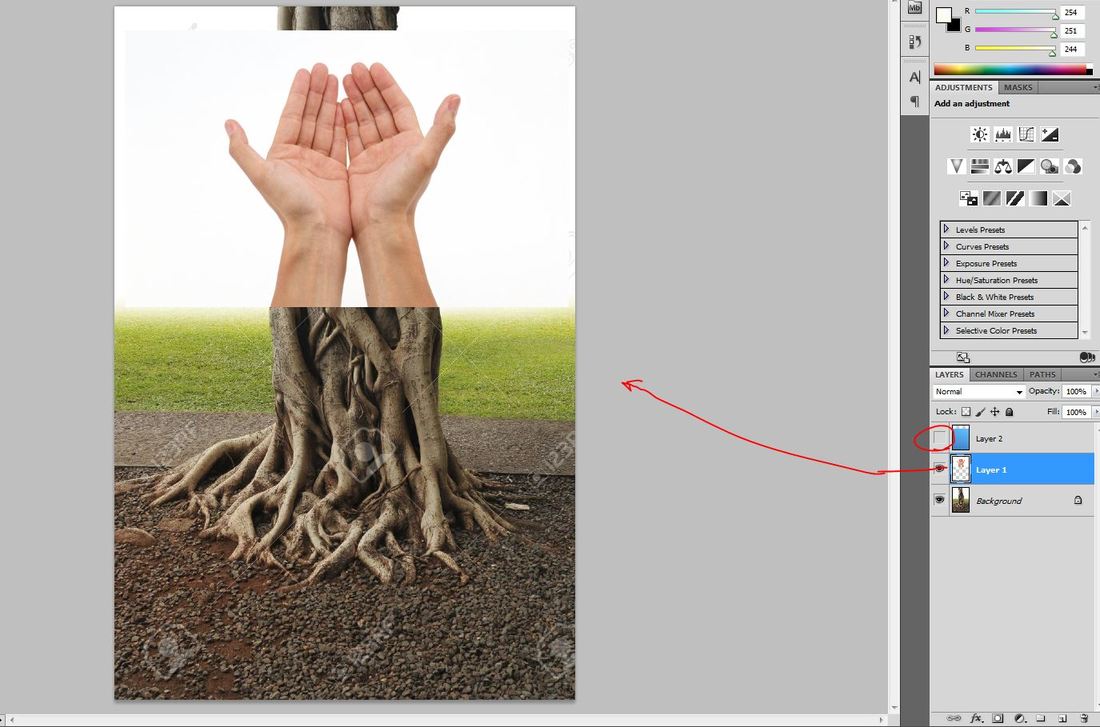
1. Place your object. I lined the wrists up with the trunk.
|
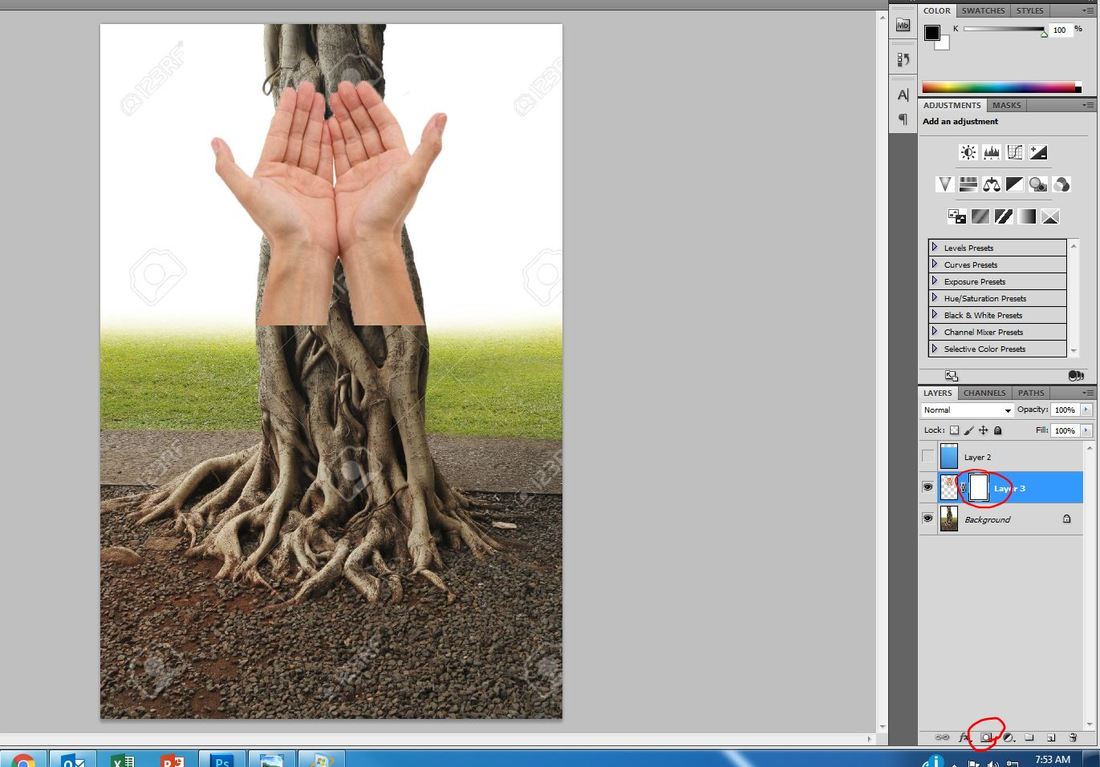
2. Jump the object to its own layer and Add a layer mask to blend the wrist to the trunk.
|
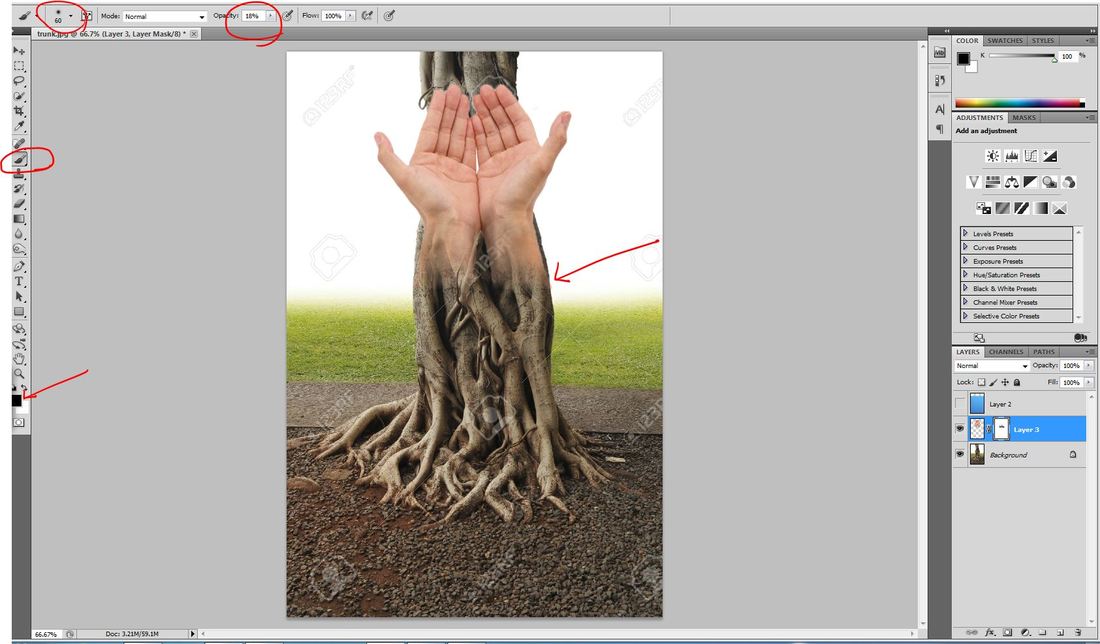
3. Use black and a low opacity to blend.
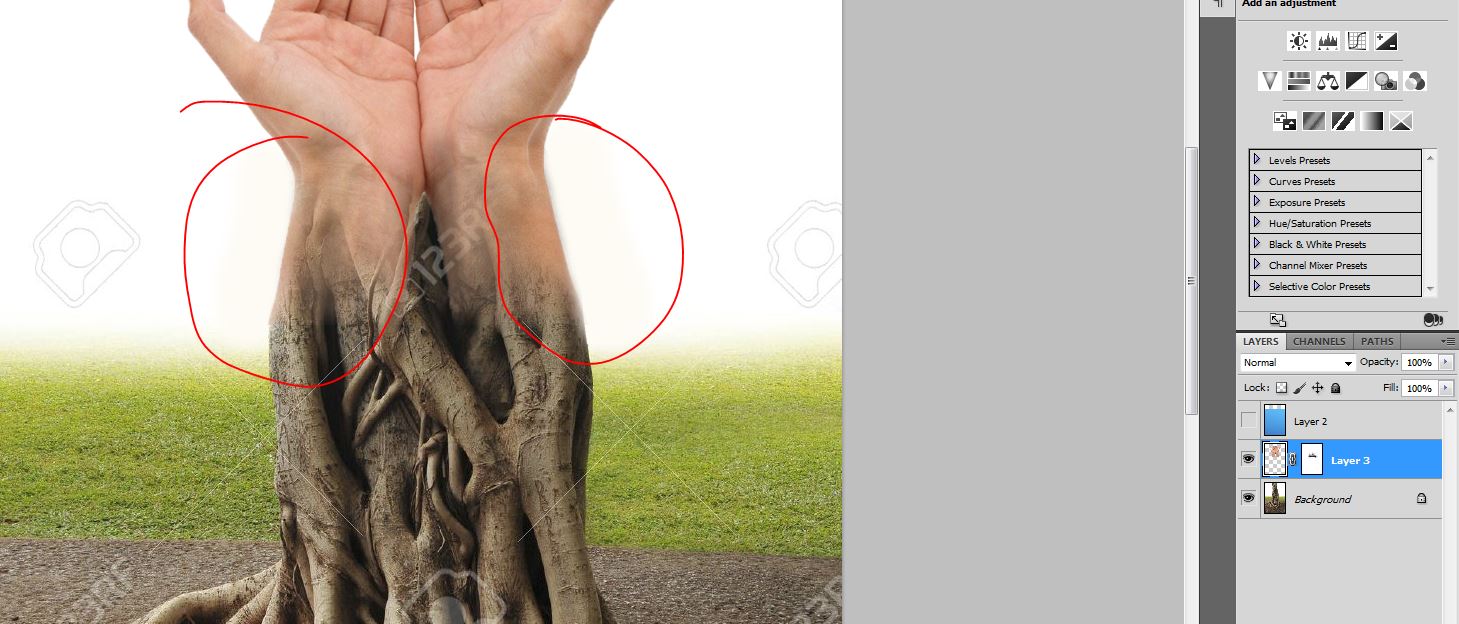
4. I got rid of the excess trunk by cloning white over the trunk.
|
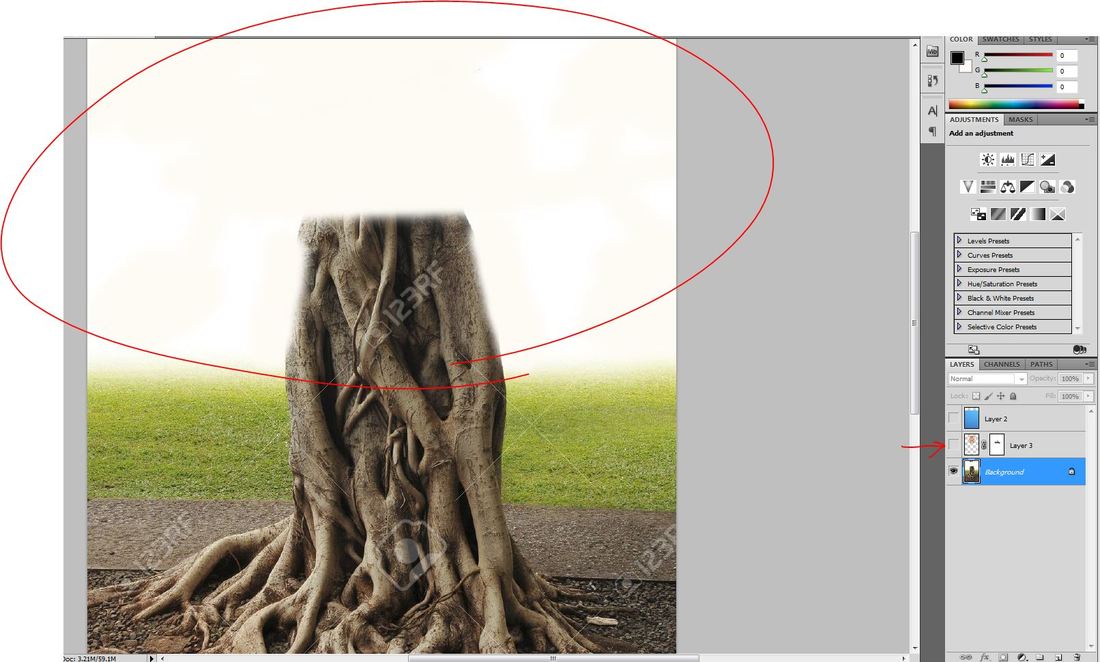
5. I cloned white over the top trunk also
|

6. I lowered the layer opacity to place the water droplet.
|
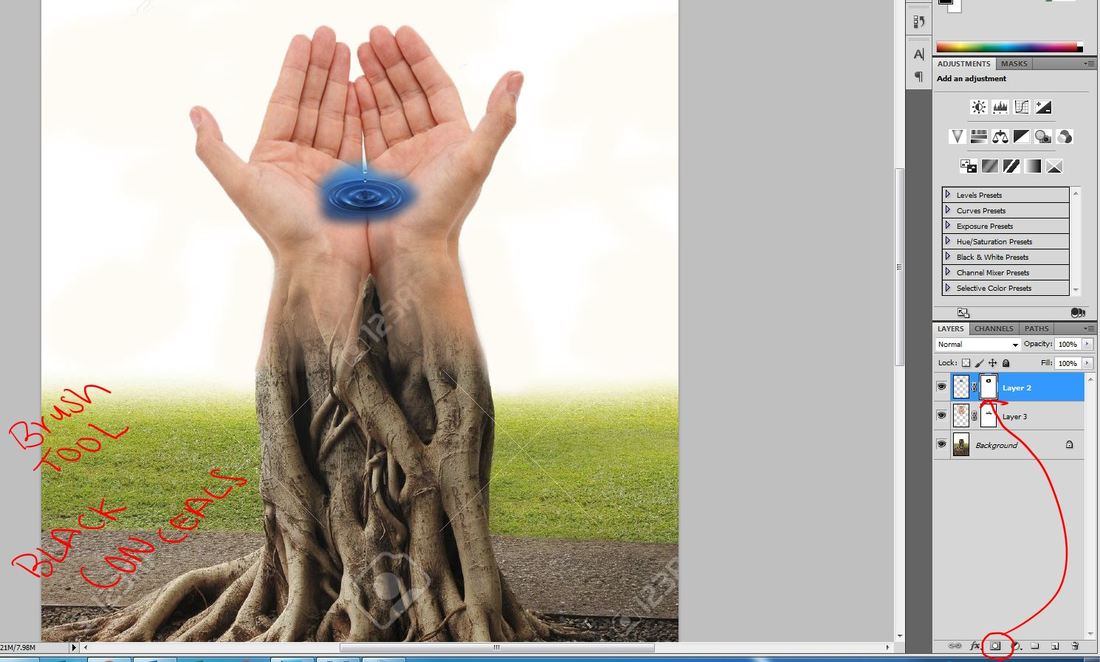
7. Blend the droplet
|
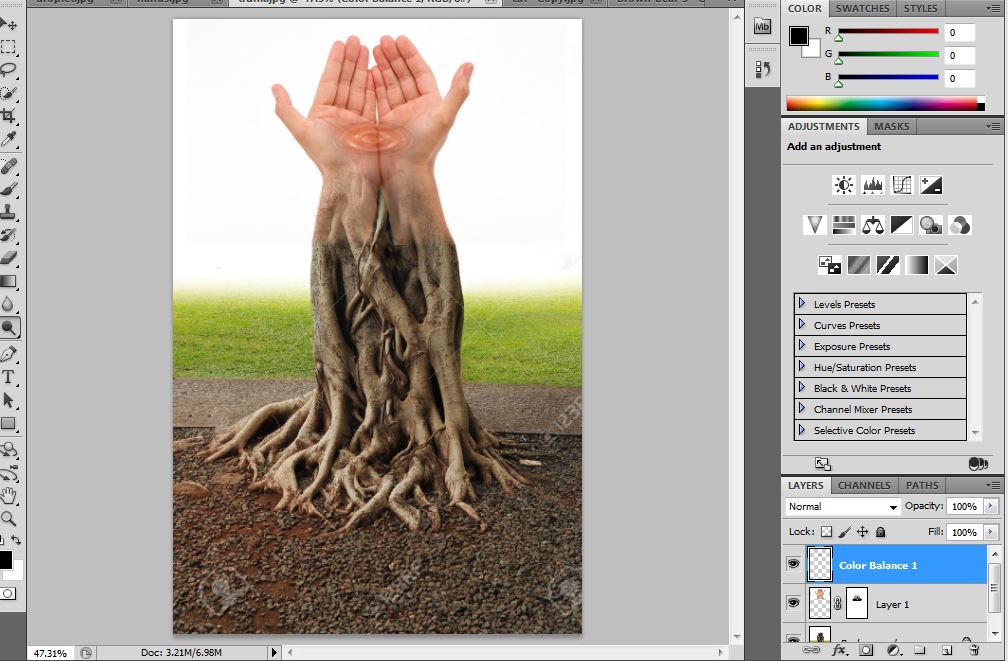
8. To Color the water Droplet: Through the cookie, make only the droplet black and white.
9. hold control and click on the hands. Add a color balance and try to match the color.
9. hold control and click on the hands. Add a color balance and try to match the color.
Face on food
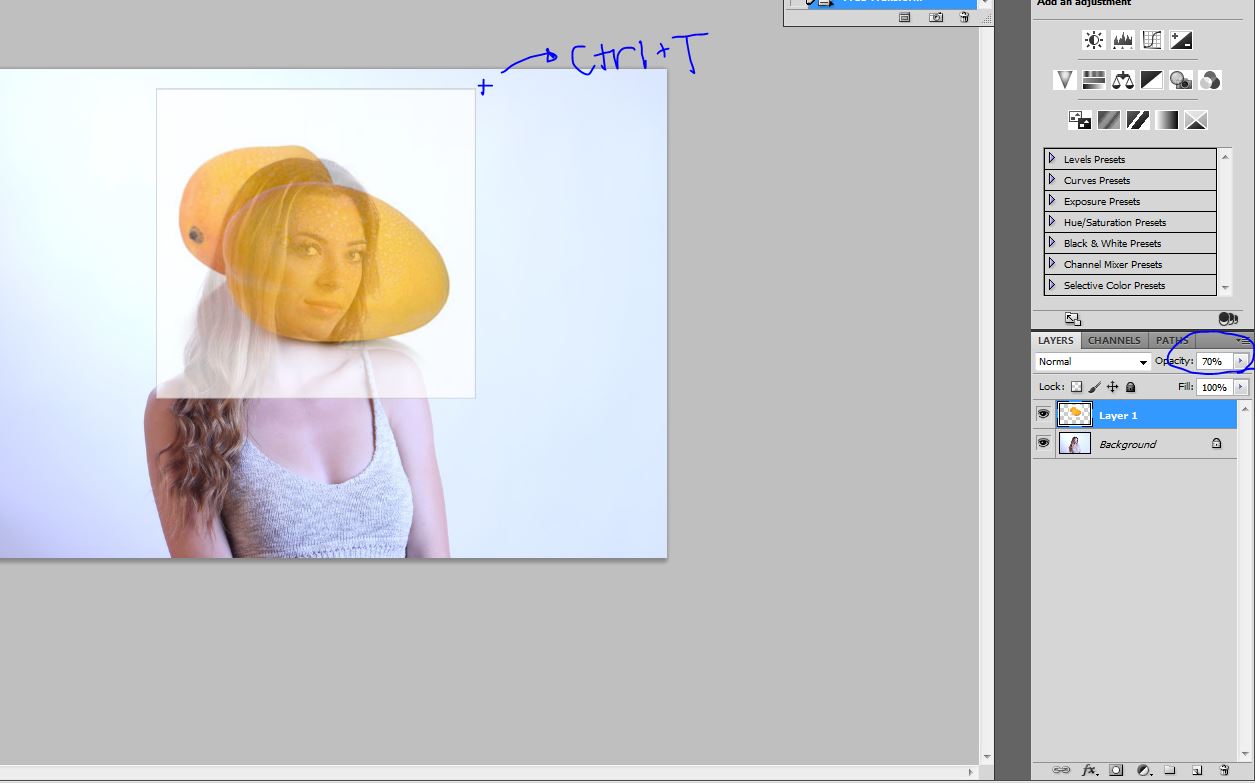
1. Lower the layer opacity to place your layer.
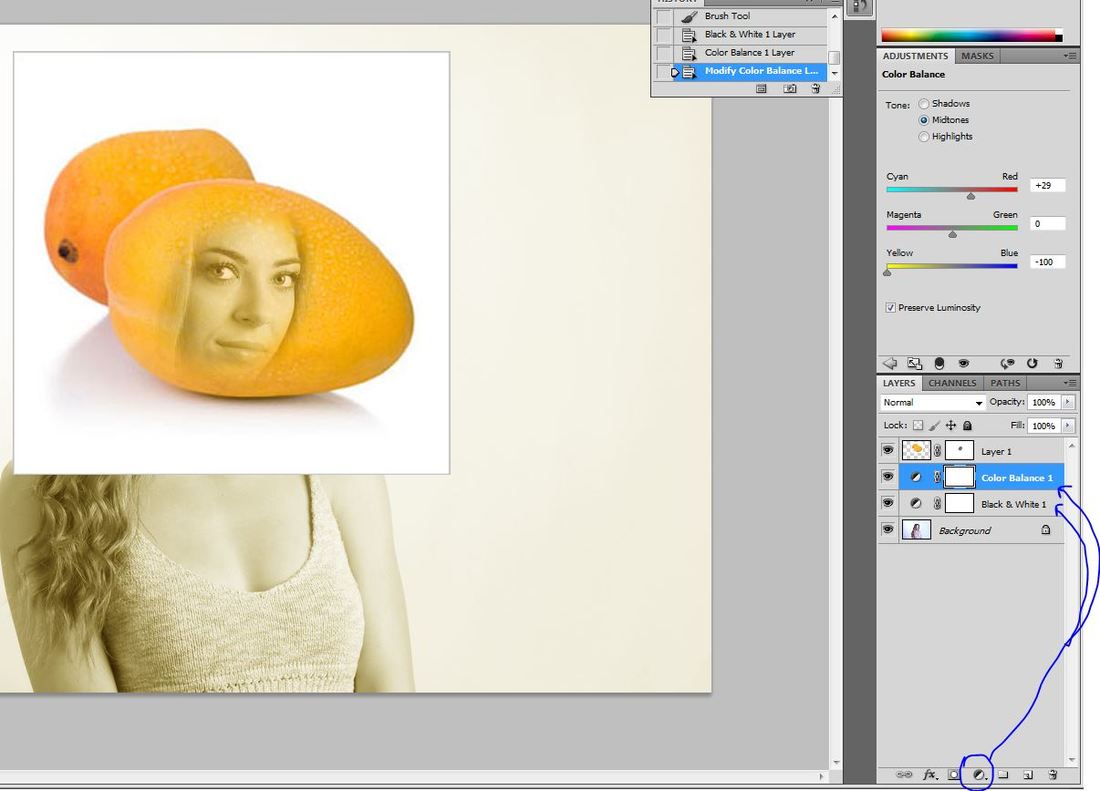
4. To change the color of your face, first make it black and white (using the cookie) and then add color balance. THE COLOR BALANCE LAYER MUST BE ABOVE THE BLACK & WHITE LAYER. (jump [ctrl + j] the color balance layer to make the color darker)
|
2. Put your layer back to 100% opacity.
3. Add a layer mask to the fruit layer. Use a 0% hardness on your brush and 20% opacity to blend the face into the food. 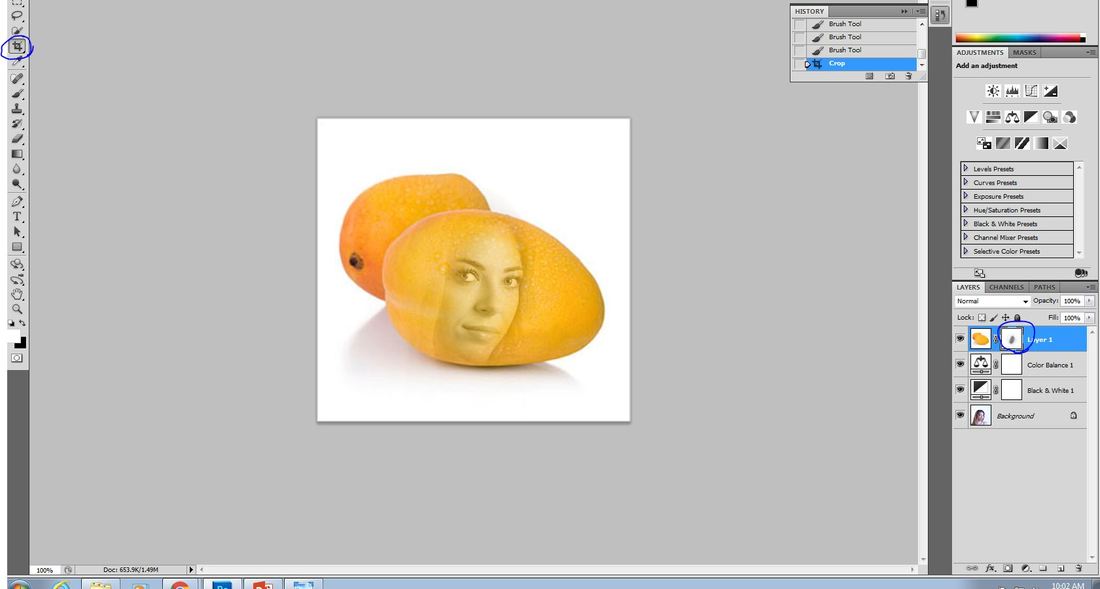
5. Continue blending your face to the food and crop.
|
